Be Thankful! (& thrifty!)

Wednesday, November 23, 2011
I made it just in time for Thanksgiving (one day to spare) but I wanted to share some easy-last minute-inexpensive Thanksgiving decor ideas. Start with a paper towel/toilet paper or wrapping paper roll. Get some raffia, hot glue and anything for a place card or name tag (in this case I used fabric leaves I already had) Also, for the 'Thankful Tree' you'll need some sticks/branches, glitter spray paint and little cut out or stenciled leaves. This project is super simple and adds that Fall/Thanksgiving touch and is also perfect for kids and family to really express what you are thankful for each and every day! Happy Thanksgiving all and as always, Happy Crafting! (time for me to go start cooking! haha)

I also found these great placemats!


Write the names of your family.guests


Leaf stencils with colored paper


gather some branches and spray with the glitter, my can
decided to stop working so as a result it is not as 'glittery'
as it should be (great for re-use at Christmas time)

its 'glittery' in the sun :)
excuse my messy dining room/craft table! But after you cut out your leaves and write little 'thankful' messages on them, attach them to the branhes with tape or string to create your thankful tree centerpiece!


Now you are ready to go with your newly created napkin rings/place holders!


Also, you can head over to: http://www.itsoverflowing.com/2011/11/memoir-of-thanksgiving-blessings-free.html
and print out the 'Blessed' printable and have the entire family write what
they are thankful for and frame it for a great addition to your table!
see below: (minus my reflection haha)


Happy Thanksgiving!

DIY Stylish Candles

Monday, November 14, 2011
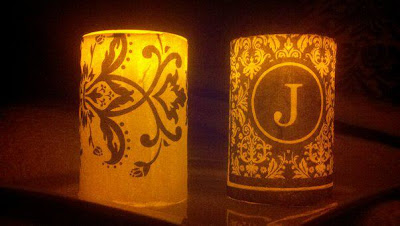
This project is so simple and can transform any room! You will love the night/day contrast as well! You will need decorative cocktail napkins (you can even splurge and get brands like Lilly Pulitizer or Vera Bradley cocktail napkins and have designer candles!) Mod Podge, foam brush or paint brush and flameless candles. I got all of the items at A.C. Moore and got the candles from Target (a little cheaper at 2 for $9.99) First of all measure your candle so you know how much of the napkin to use/cut. Next, cover your candle with a layer of mod podge and begin to wrap napkin slowly making sure to avoid bubbles/bumps so smooth as you go. (if there is a filler layer in the napkin remove so that you are only using the one with the design)


These Napkins came from Target and the monogrammed ones I found in my kitchen!

since you can see underneath, forgot to mention you will need AAA batteries most likely

When you have finished wrapping the napkin, secure any edges with more mod podge or cut around the bottom. Also, try not to overlap as much as possible. Let it dry for about 15 minutes or so and begin to brush on the first layer of mod podge. (like a seal) When that is dry you may want to do one more (the more layers the more glossy the finish) 

my room is done in black & white :)

as you can see they are gorgeous by day and stylish by night!


And there you have it, DIY flameless candle decor! Happy Crafting! I will be doing more closer to Christmas with different patterns so check back!