I LOVE to entertain! Whether its a cocktail, birthday or (coming up) Super Bowl party - I thrive on this stuff! haha so I thought, rather than going out and picking up supplies each time, what are some little things I can craft to help? With all the buzz going around about homemade coasters- I jumped on them! A serving tray is always nice and can carry you right into the summer with your outdoor BBQs etc -and of course some easy homemade Sushi! For the coasters you will need tiles (glass or ceramic) from your local hardware store, Mod Podge, foam brush, Felt sqaures, scrapbook paper of your choice (thats the fun part) and Acrylic Spray Seal (lowes). You'll get addicted to making these match your home, making them for gifts and before you know it you'll be swimming in designer looking coasters. See tutorial under each photo and as always Happy Crafting!! **Then head over to the Good Eats section for the Sushi making!
 |
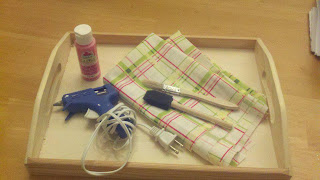
| simple tray from A.C. Moore, fabric and supplies you most likely already have! |
 |
| Paint desired color (I felt oddly girly during this session) |
 |
| now we have scrapbook paper, tiles, modpodge and foam brush |
 |
| To save some time go ahead and cut your bottom felt pieces to make sure the coasters won't scratch any surface |
 |
| I will say those little circle stick felt pieces that people use on chairs, etc. would be much easier! |
 |
| Start layering on your Mod Podge- coat the tile itself so the paper will stick then brush over it, let it dry about 15 minutes- and repeat about 3 times (the wrinkles will smooth with more coats) |
 |
| Next, take them outside (the acrylic is strong!) and spray in a back and forth motion. 1-2 coats is good and this makes them water resistant (and shiny!) |
 |
| And there you have it, super easy DIY coasters! (and tray!) ps Seth picked up some 'manly scrapbook paper' so that is why we have included the metal looking ones! More of those to come to later! |
 |
| Add matching ribbon and these are perfect gifts! You can even personalize with photos! |
 |
| I heart coasters (toile ones!) |


.jpg)

